We have been lucky enough to be in correspondence with the original architect and his son via email throughout the month of May 2016. We know know much more about Mr. Lakeman and his career. Please enjoy the robust info below.
At the closing, we happily learned that the home was designed by Richard Lakeman, who is the brother of the departed first owner of the home (Lorraine Lakeman Wuenker and her husband James).
The first two were in Northern Cincinnati (Gene Amer and George Fannity Homes) and a third in Georgia designed while Lakeman worked under famed architect Carl Strauss.
At some point between 1962 and 1975 Lakeman moved from Cincinnati to Portland, Oregon (Source: Mark Lakeman (son) Bio)
Lakeman, who as the founder of Portland’s Urban Design Division within the Bureau of Planning, was a key design activist that is credited with being the driving force behind Portland, Oregon’s Pioneer Courthouse Square. (Source: Mark Lakeman (son) Bio)
His private practice was diverse and beautiful for nearly three decades, doing all manner of public and private projects of every scale.
Home commissions have been very special projects for Lakeman, as he enjoys matching the design of the residence to the people who will be living there.
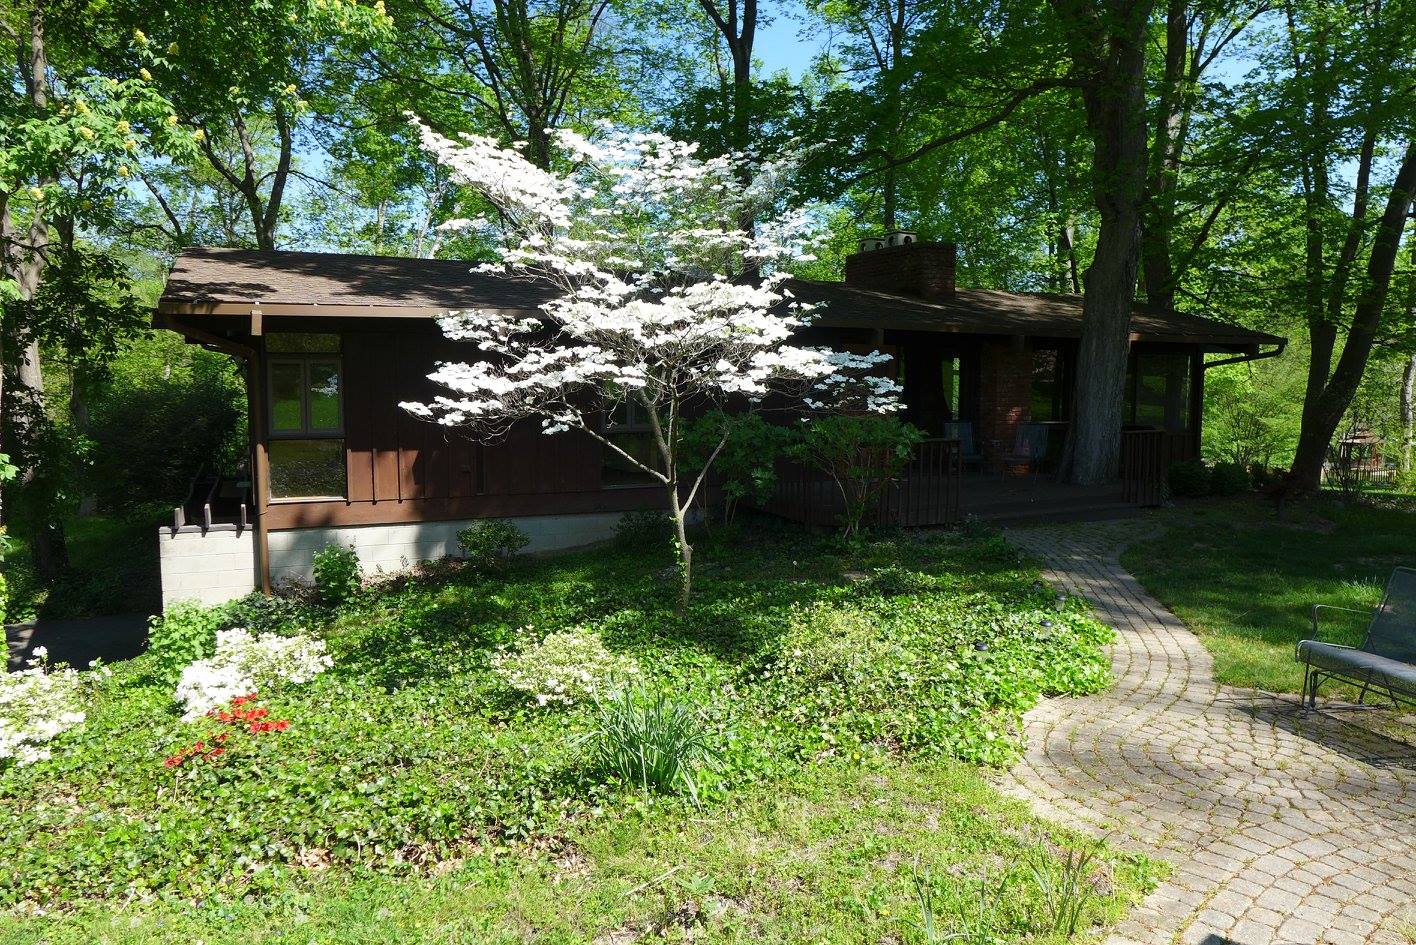
Lakeman Treehouse with dogwood blooming in front May 2016
Since we moved in our mailbox has been quite the eyesore. According to neighbors, it was hit multiple times prior to us owning the home. And then it has been hit at least 4 additional times that we know of, thus making it something worthy of only the Clampett family. The poor thing was faded, wobbly, dented, and the door was hanging off, it was a beautiful feature to house for sure and provided excellent curb appeal (please read my sarcasm). It was so bad, we don’t even have a picture of it.
Our dilemma was that we knew we needed and wanted to replace it, but we weren’t sure what the best decision would be for the neighborhood and the house. Most of our neighbors have what could be considered standard traditional mailboxes and for the most part they work with the style of the more traditional and transitional homes, but we just didn’t feel that the traditional style would work for the total modern vision we have in mind. So we went on an internet search to determine what other atomic ranches and Mid Century Modern homes did for the basic need of receiving mail while keeping modern aesthetics. You can see some of the search results on our Midcentury Landscapes Pinterest Board.
After weeks of deliberation and planning, the mailbox was hit again so hard that the box part detached from the post and it was really and truly at the end of its life. Sometimes the universe has a way of telling you what to do next, we took this as our sign that we needed to make a decision and we settled on attempting a “weekender” modern mailbox project posted by Lowe’s with a modifications of using weatherproofed cedar board rather than painted pressure treated lumber and making the top cedar rather than plywood.
The Image from Lowe’s for the Selected Project (c) Lowe’s
While we were planning, we found out why our old mailbox kept on getting hit when we reviewed the US Postal Service’s Mailbox Guide. Somewhere along the line of it getting hit, the box became even with the curb. Our new box has been installed following the guidelines that are so clearly illustrated below.
We were so happy to come to a decision. We made our list and planned a visit to our local Menards, where the lumber price was significantly less expensive compared to the other lumber yards and big box retailers. We purchased the following for a total of approximately $350 (nobody said style was cheap!):
Before we started, we realized we needed to have the utilities marked since a natural gas pipeline runs through our front yard, so we called 811 to make sure we weren’t going to hit anything we shouldn’t during the install. When we called they said it would be 48 business hours before all the lines were marked. Surprisingly, they were all marked within 24 hours!
The location of the lines (we
The Energy Co Flags
After the call and we had some lunch, then we got to work. We set up an assembly line where I (Laura) was measuring and David was cutting. We work as an efficient team and we made quick work. We made spacers to ensure the slats were all spaced evenly and got started nailing that afternoon with the goal that the surround would be fully assembled by dinner.
Cutting the slats
Laying out the sides
Assembling the sides
Checking our work
We following the directions diligently, but we were rusty in our woodworking projects and forgot to make sure of the squareness of the assembly. This was quite an epic fail. We were working later than we had hoped but put the final surround up to admire our work and noticed it was cattywompus. This is where things got interesting, as we then started the discussion only 2 spouses can have when a project goes sideways. I’ll spare you the details, but suffice it to say we took a break and determined the best thing to do was to stop talking about what happened and sleep on it.
The next morning we had some brainstorming over breakfast and we came up with a plan to hopefully fix our mistake. We determined through measurements that 1 full side and half of another were the culprits to the unevenness, so we disassembled these areas and started reassembling while checking each slat and side with a carpenters square. (Note: we did not take pictures on this morning.) More words were had, but we slogged through and ended with a wonderfully square surround. (Note: we’re still happily married and will have more projects together.)
The lines weren’t yet marked so we couldn’t start digging, but we could mark the desired location by removing the sod. Since the bottom had the stakes sicking out (to bury the surround in the ground), we accomplished this with our preschool supervisor by turning the whole thing upside down and using a spade to mark the perimeter.
Checking the distance from the curb.
Marking the outside of the surround
Marking the outside of the surround with supervision
Now four days later into our “weekend” project, we dug the hole for the post and set the mailbox. We dug 24 inches down and added gravel at the bottom of the hole, used the post level and a standard level to make sure the mailbox and the post were at the very least level to themselves and poured the concrete.
Setting the post and Surround
The project Supervisor
A day or two later after the concrete had cured, we added the front and top slats and then applied the wood protector to seal the cedar. Two days after that (the next weekend) into the “one” weekend project, we added our house numbers to each side of the mailbox and then reattached the red flag from the mailbox to the right side of the decorative surround.
The front
Left Side with Numbers
Right Side with Numbers and Flag
Some final touches of a river rock bed (approximately 6 bags) surrounding the mailbox with some succulents, we were finally finished!
The Final Project!
Construction Notes
If you decide to try this project or something similar based on the Lowe’s instructions, we found some of the instructions to be in error or could be better clarified:
1) The instructions say to rip down the 1×4 to 3″ for the support but in the video they are using 1×2 boards. If you rip to the 1×4, you will need to use a jig saw to adjust the opening for the mail box.
2) There is noting in the instructions to indicate how to make sure your assembly is square- you will want this to be somewhat square so your mailbox appears to be straight. So use a carpenters square when assembling to ensure you have success.
3) The use of plywood for the top is ill advised for outdoor use. (this is not noted in the materials list). We ended up cutting additional 16 3/8″ 1×4’s and ripping them to be spaced at 1/2″ on the top so they appear to be even.
4) It is unclear how they suggest to set the mailbox post to make this design work. You’ll have to figure this out.
Note: Our blog is a labor of love, however in an effort to help fund the hosting MidModFamily.com is a participant in the Amazon Services LLC Associates Program, an affiliate advertising program designed to provide a means for us to earn small fees by linking to Amazon.com and affiliated sites.
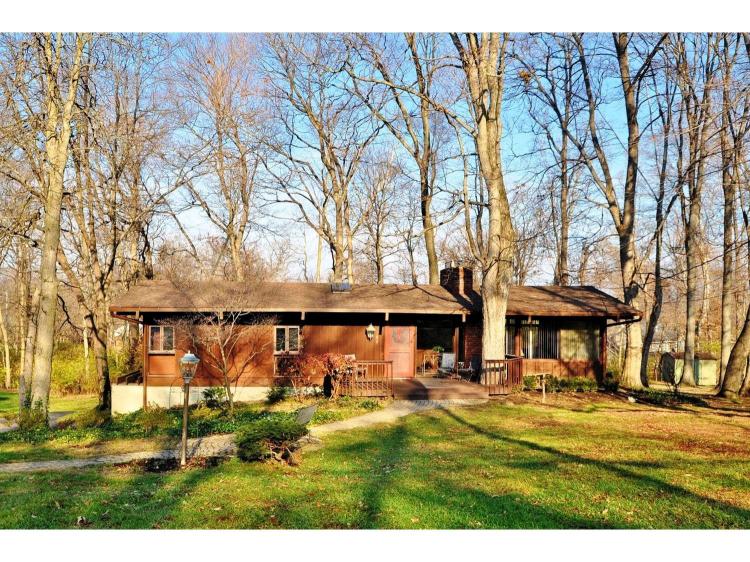
One of the first things when we saw the Lakeman Treehouse for the first time, was that it needed a stronger curb appeal. In all actuality we almost didn’t look at the listing photos because it just blended into the wooded landscape too much. The same brown stain on the exterior and beams did not highlight any of the unique architectural details of the house that we fell in love with. Through many deep family discussions, as only visual creatives can do, and a fair amount of research on whether to use paint or stain, we went the stain route and determined our colors.
The Original Listing Photo of the Lakeman Treehouse
For brand, we determined that Benjamin Moore Arbor Coat stain was our best option for preservation. For color, we settled on a base gray tone for the house and the beams would be a very dark gray or black. Next came the laborious task of testing color and stain opacity. Through many different small cans or colors we settled on Amherst Gray solid stain for the body of the house and Black solid stain for the beams and window surrounds. We were hoping to be able to use a semi-solid opacity, but we decided to go with a solid formula because the brown stain on the house was so opaque and the only way we could get the color we desired we would have needed to strip the entire house.
Front Porch Color Testing
Color Testing Detail
Back Deck Color Testing
As we progressed with staining the exterior, we had the sudden realization that our house was a bit like an “inside-out house”: meaning that since the beams go through the windows like so many other Mid-Century Modern homes, the color of the posts and beams should be the same on the inside as they are on the outside. It wasn’t truly a realization, we knew this all along, however it became more apparent as we saw the inside not matching the outside.
Inside-out House: Notice the beams passing through the plate glass window
The process has been very laborious because the house had not been stained in decades and needed a great deal of prep work before any staining could start. In fact the prep work, has taken most of the time on this project. Each beam and post outside and in has been looked over for cracks and holes, and then were filled with Elmer’s Brand Stainable wood putty or All Purpose Bondo Putty. Holes and cracks in the cedar batten board siding have also been filled with wood putty and/or Bondo. Throughout the years, the batten siding has become extremely blistered from the sun. Again, for proper stain adherence, all the blistering was sanded/ground down to create a smooth surface to stain. From a previous home renovation, we found a very useful tool to remove loose paint from exteriors called the Wagner Painter Eater along with 60 grit sand paper attached to an orbital sander. These two tools combined with patience seems to get all the blistering stain off. For each exterior wall this can be days of work.
Once all the walls, posts and beams and walls are prepped, they are stained with 2 coats of stain. The photos of the house in this post are the progress over the last year. Just one section around the garage is left on the outside and about 1/3 of the inside is done.
Note: Our blog is a labor of love, however in an effort to help fund the hosting MidModFamily.com is a participant in the Amazon Services LLC Associates Program, an affiliate advertising program designed to provide a means for us to earn fees by linking to Amazon.com and affiliated sites.
No, we’re not talking about building materials here, we’re talking about planks, the exercise. If this post isn’t your thing, that’s fine carry on and stay tuned we finally also have some house posts scheduled.
I have “amped-up” my running and walking in the past 2 months in preparation for the 27K Stone Steps trail race on October 29 and my goal of running the Topo Trail Marathon on December 3. In July I logged 91.2 miles, most of them running and participated in the farthest race to date on July 29th with running the 5.8 mile Caesar Creek Trail Race put on by Topo Adventure Sports. I am really feeling amazing with my progress, but as I am training I need to figure out what cross training looks like. In my research, I came across a post on FaceBook about a 30 Day Plank Challenge and I wanted to try it out to see if by 30 days I could hold a 5 minute plank while increasing my core strength while accompanying some other weird to me strenght workouts- ever hear of Tabata? (that’s another post entirely).
Laura’s July 2017 measured work-out distance
However, I couldn’t just try this alone, you know misery loves company! So, being the social butterfly that I am I posted about it on Facebook and now have 33 friends (including David!) doing this with me! I never ever thought this many people might be interested in this. I am so excited to have buddies along the way pushing me to be better tomorrow than I am today. So Cheers to planks and I’ll keep you posted on how I feel after the end of the month!
So it has been a few months since we have posted anything about updates to the Lakeman Treehouse. Since last Summer, we having been working on the landscaping, and on exterior and interior staining. Photos in a new posts soon. Thanks to several friends we have been able to plant many donated perennials in our new gardens making the results look great this spring and summer.
In late 2016, we finalized our plans for the house renovation with architect, Eric Puryear, and then finalized a landscape plan with Creative Scapes. As with many house renovations and life decision, it takes lots time and energy to make all the final decisions. We have decided on using The English Contractor and the hope is to start the “big” renovations of the house later this year.
We are continuing to stain the exterior of the house and make other exterior updates. One of our early summer projects was the replacement of our old rickety mailbox that made the house look like the Clampetts were living here with one of a more modern design appropriate for our house. The old one had been hit so many times it was time for a new one. Look for a new blog post and photos about that soon.
On March 25th, 2017 our family will be traversing throughout Northern Kentucky in a quest to find the elusive leprechaun and raise money for the League for Animal Welfare. This is an event the Knight family has participated in for many years and we hope you consider donating to help us reach our goal of raising $250 for the league.
This year, we are rallying in memory of our recently departed dogs, Twiggy who passed in November and T’Pol who passed at the end of January. Please help the rally raise $6000 so we can all help every doggie know the love of a warm home.
“A dog is the only thing on earth that loves you more than he loves himself.”—Josh Billings
From the Organizer: Every spring for the past eleven years, the Greater Cincinnati sports car community comes together for an informal, grass-roots charity road rally that benefits a fantastic no-kill animal shelter. That shelter is the League for Animal Welfare. The League is a Charity Navigator four-star rated(the best) non-profit that does amazing things for homeless animals in our region.
To date we spent countless hours working in the yard. We’ll never have an excuse to say there’s nothing to do ever again.
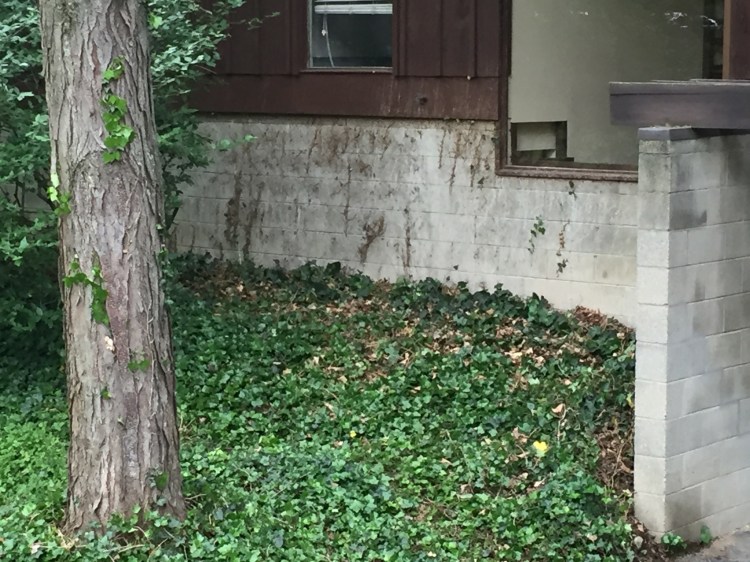
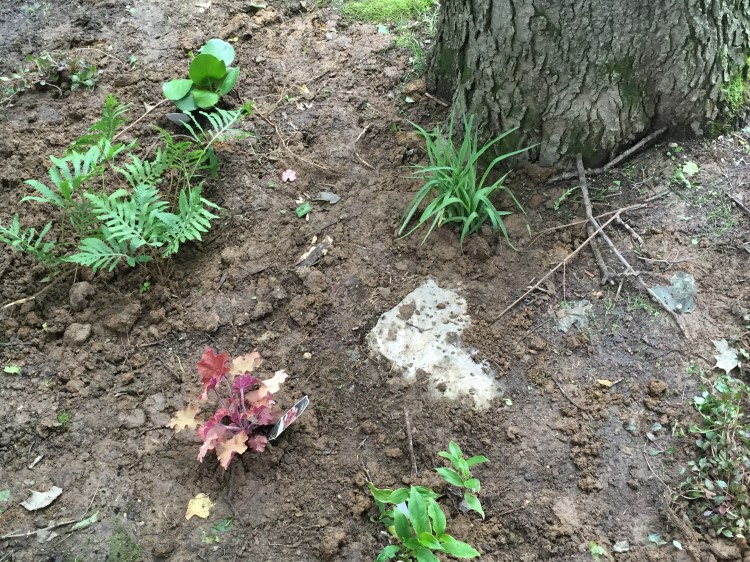
We’ve added plants in the front yard and back that we have acquired through the kindness of friends and plant sales. We have pulled so much overgrown English ivy that we could cover Fenway Park. We hate to discard plants, so it was a bonus that Laura’s boss took 2 contractors bags full. We still have more to go!
We have realized that the front yard needs a good thatch removal and reseeding as we have kept up mowing with the breakneck speed of the spring growing. Hopefully we can get the grass looking as lush as the neighbors very soon, but as with all things in life patience is a virtue.
Before ivy removal on west sideDuring ivy removal with a helperAfter ivy removal from west sideAfter removal of ivy on west sideA shade loving begonia to the backA funky fern of unknown name to the back.Spiderwort to the back – realized we need to plant in a sunnier areaA shade loving columbine for the backToad lilly for the backOverall back plantings off the deckHostas for the frontVarigated hosta in the frontBlue varigated hosta in frontSweet Woodruft in the frontOverview of front plantings
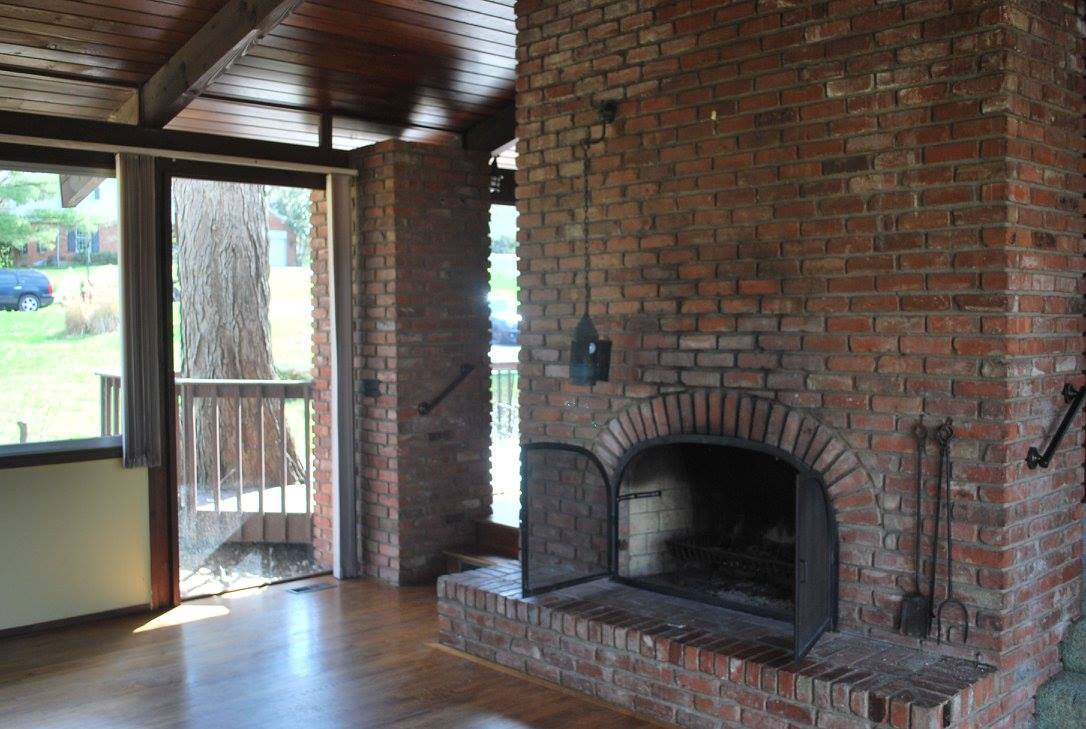
These are the images of the state of the home when we completed our final walk-through just before signing the closing documents. We are working with an architect, Eric C. Puryear, to determine the best plans to keep the atomic aesthetics of the home yet update it for a modern family.
We’ve bitten the bullet and we are trying out blogging since many of our friends and family want to see our journey of renovating the Lakeman Treehouse, so here goes nothing!
If reading a blog isn’t your thing, you can follow us on Facebook and Instagram too!